VMware How To: Understand Auto Deploy - vSphere 6.7
11 Oct 2019 by Simon Greaves
Auto Deploy is a useful capability of vSphere that prevents administrators having to manually install and configure tens or hundreds of ESXi hosts. It enables ESXi to boot, and if required, run in memory instead of having to go out and purchase hundreds of local hard disks or USB/SD cards for each server. You can still purchase these disks if you like to enable you to take advantage of additional capabilities of Auto Deployed hosts which I will cover below.
Fundamentally, Auto Deploy uses image profiles that are created using Image Builder, vCenter Server and Host Profiles.
This guide covers vSphere 6.7 and 6.5, hopefully it will give you some much needed knowledge on Auto Deploy for the Advanced Deploy vSphere 6.5 Exam 2018 (3V0-21.18) (VCAP65-DCA). Ok, with no further ado, here are the facts.
Auto Deploy Modes
ESXi hosts that utilise Auto Deploy have 3 key deployment mode types. Stateless, Stateless Caching and Stateful Installation types.
Stateless
With Stateless, no local storage is used, the host configuration is abstracted into a Host Profile and applied when the host connects to the appropriate vCenter/Cluster.
By default, ESXi connects to vCenter with a standard switch, if the host profile specifies a dvSwitch, vCenter joins the dvSwitch.
Advantages
- Easy replacement, removal and addition of failed hardware
- Improved ease in scaling a hardware deployment
Stateless Caching
Stateless caching saves the image and configuration to a local disk, but the host continues to book stateless. When the host profile is applied to ESXi, the image running in memory is then copied to the boot device. This acts as a backup if the PXE infrastructure or Auto Deploy server become unavailable. When the host boots, if the network boot fails it will time out and the host boots with the cached image on the disk. Stateless caching can be configured to overwrite or preserve existing VMFS datastores.
This definitely has it’s advantages as there is not such a strict dependence on DHCP, TFTP and Auto Deploy server. The downside is that the image might not be current if a setting has changed since it was last saved to the cache disk or if vCenter Server is available after booting it will not just take over the image without a further reboot.
There is a requirement on assigning a dedicated boot device to ESXi, pre-installation.
Stateful Installation
The main difference here is that only the first boot is done by Auto Deploy. All subsequent boots are done using the local disk.
Once that first boot is done, PXE and Auto Deploy is no longer used.
Unfortunately this has some disadvantages.
- Over time the configuration might become out of sync with the image in Auto Deploy
- Patching and updating must be done using the traditional methods
Locations of configuration and state information
| Boot Disk | Center Server |
|---|---|
| Image State: ESXi base, drivers, CIM Provider | Image Profile |
| Configuration State: networking, storage, data and time, firewall, administrator password | Host Profile |
| Running State: VM inventory, vSphere HA state, license, vSphere DPM configuration | vCenter Server |
| Event Recording: log files, core dump | Add-in components |
Host Stored Information
Image State
Executable software to run on ESXi. This makes up part of the image profile which can be created and customized with either vSphere Web Client or vSphere ESXi Image Builder CLI.
Configuration State
How the host is configured. Examples, boot parameters, driver settings, vSwitch settings. These are created using Host Profiles in vCenter Server.
Running State
Settings that apply while ESXi host is up and running, the state also includes the location of VMs in the inventory and VM auto start information. This is all managed by vCenter Server.
Event Recording
Information found in log files and core dumps. This information can be managed by vCenter Server, using add-in components like vSphere Dump Collector and Syslog Collector.
Architecture
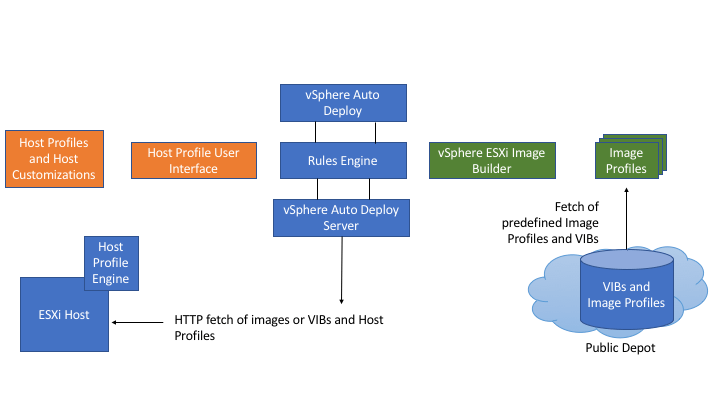
Auto Deploy Server
Manages Auto Deploy Infrastructure.
Auto Deploy Rules Engine
Tells Auto Deploy server which image and which Host Profile to serve to which host.
Use the Web Client to define the rules that assign image profiles and Host Profiles to hosts.
Image Profiles
Define the set of VIBs with which to boot ESXi hosts.
There are public software depots from VMware and partners available. Use Web Client to examine the depot and the Auto Deploy rules engine to specify which image profile to assign to which host. Can create a custom image profile based on the public image profiles and VIBs in the depot and apply that image profile to the host.
Host Profiles
Standard host profiles that specify ESXi host configuration. Use a template host that profile for other hosts.
Host Customizations
Stores host-specific information. A host customization must be create for each host.
Rules Engine
Defines which Image Profile and Host Profile to apply.
Rule engine includes:
Rules
Rules can assign image profiles and host profiles to a set of hosts or specify the inventory location (folder or cluster) of a host on the vCenter Server system.
Deployment rules can identify target hosts by boot MAC address, SMBIOS asset tag, BIOS UUID, Vendor, Model or by a fixed DHCP address. Typically, rules apply to multiple hosts. You use vSphere Web Client to create rules. After creating a rule you assign a rule set. Once the rule is in the rule set it cannot be edited.
Rule Set
Rule sets are made up of Active Rule Set and Working Rule Set.
Active Rule Set
Used during deployment. When a newly started host contacts Auto Deploy with a request for an image, the server checks the active rule set for matching rules. The Image Profile, Host Profile and vCenter Server inventory location that are mapped by matching rules are then used to boot the host. If there is more than one item that is mapped by rules, the Auto Deploy server uses the item that is first in the rule set.
Working Rule Set
This is used to test changes to rules before making them active.
PXE Boot Infrastructure
DHCP Server
Assigns IP and tells ESXi to contact TFTP server.
TFTP Server
Provides ESXi a gPXE file to boot the host.
Boot Sequence
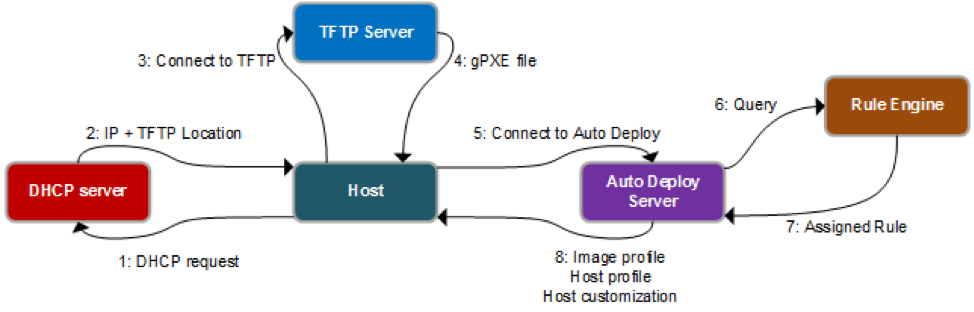
- ESXi requests an IP using DHCP
- DHCP server assigns IP and tells ESXi where the TFTP server is located
- ESXi contacts TFTP
- TFTP gives ESXi the gPXE boot file
- The gPXE file tells ESXi to make an HTTP Boot Request to the Auto Deploy server
- The Auto Deploy server queries the rules engine to provide the Host Profile, Image Profile and Cluster required
- The rules engine maps profile to hosts by looking at rules such as location for host A is cluster A and host B is cluster B.
- The Image Profile is then pushed to the host in the form of a VIB.
Once the host boots up the host is placed into the cluster specified in the rules. If no cluster is provided it is placed into the first datacenter available. DRS kicks in and will rebalance the cluster with the new host in it. Should the host be added without a host customisation or if the host requires user input to finish building, the host is put into maintenance mode. The host is now rebooted and the host goes through PXE boot again. As before:
- DHCP assigns an IP address and tells it to contact the TFTP server
- The TFTP server provides the gPXE image and gPXE configuration file
- The Auto Deploy server is contacted
- Auto Deploy tells ESXi to make an HTTP boot request to the Auto Deploy server
- The ESXi image is downloaded to the host
- Finally the host is placed into its appropriate cluster on start-up
Unlike the first boot, on the second boot the Auto Deploy server uses the saved information rather than checking the active rule set for the appropriate rules to apply as the host has already been configured by the rules engine during initial boot. This has the advantage of making this second (and subsequent) boot quicker as the image has already been determined. The Image Profile isn’t queried this second time as the information is already in the Auto Deploy rules engine.
Custom Scripts
You can run scripts or script bundles written in Python or BusyBox cmdlet.
Scripts run in alphabetical order after initial boot before any additional tasks are performed.
Scripts are in .tgz format.
Must be under 10MB.
Proxy Servers
Booting multiple stateless hosts can place significant load on vCenter.
To bypass this you can deploy proxy servers.
In situations where vCenter cannot supply the image to the booting host, then the proxy server is used.
Use the Auto Deploy PowerCLI cmdlet Add-ProxyServer to add a cache proxy server.
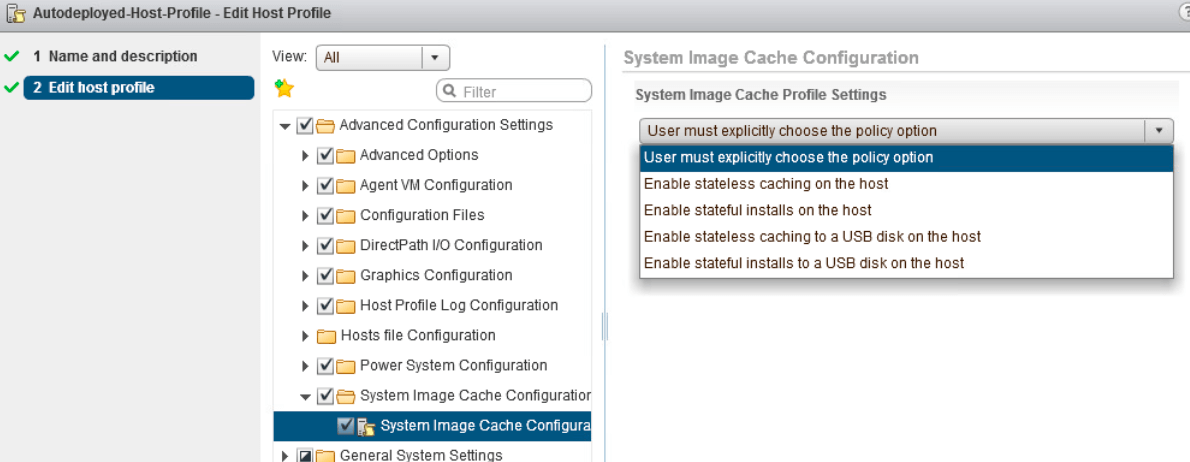
Stateless Caching and Host Profiles
To use host profiles with stateless caching you need to enable the Enable Stateless caching on the host setting in Host Profiles.
Stateless Caching and the Local Boot Device
There are situations where the auto deploy server is unavailable or the PXE environment. To minimize the impact of these situations, you can specify to save a stateless caching copy to a local disk on the host. A local copy of the boot image is saved to USB drive or a local boot device you specify in the Host Profile.
Stateless Caching Limitation Scenarios
In certain scenarios, there are some limitations with stateless caching:
Scenario 1 - vCenter is available but Auto Deploy Service is not available
In this scenario, the host doesn’t connect to vCenter but you can connect manually to vCenter or wait for Auto Deploy Service to become available again.
Scenario 2 -vCenter Server is unavailable (including Auto Deploy Service)
You can connect to each ESXi host using the host client and add VMs to each host, although if you have lockdown mode enabled you may need to set exception users for this.
Scenario 3 - If vCenter Server is not available
DRS does not work. Auto Deploy cannot add hosts to vCenter, you can connect using the host client with the same limitations as in scenario 2.
Scenario 4 - If you make changes to your setup while connectivity is lost The changes are overwritten when the connect to Auto Deploy server is restored.
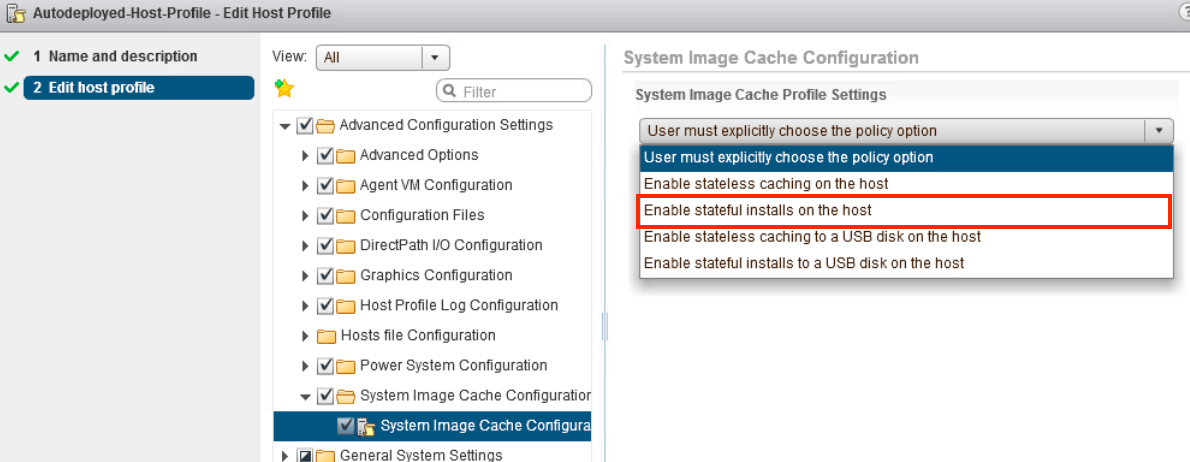
Stateful Installation
- Create a host profile for stateful installation
- Use Auto Deploy to boot the ESXi host, the ESXi image is saved to the disk and the host profile is applied
- Future boots are directed to the local disk, no further attempts are made to contact the PXE or Auto Deploy servers
Steps to setup Auto Deploy
-
Prepare the DHCP server (examples given for Windows 2012 but other DCHP servers can be used)
-
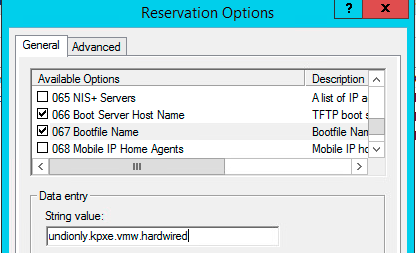
Create rule 66 Boot Server Host Name and specify the TFTP server host name.
-
Create rule 67 Boot File Name and specify the iPXE binary undionly.kpxe.vmw-hardwired.
-
-
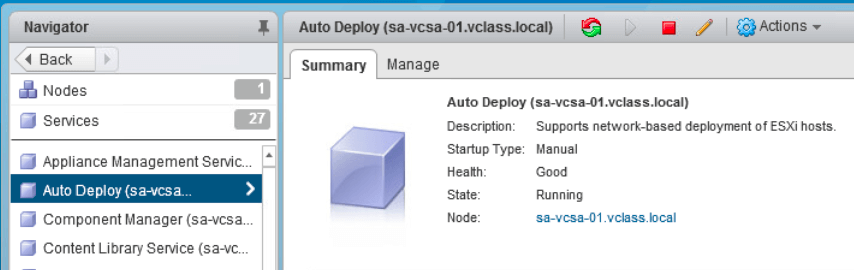
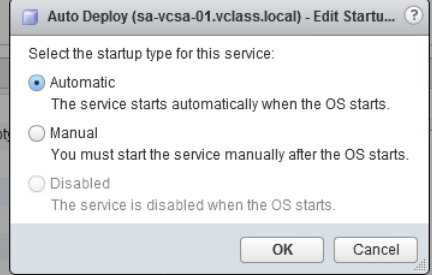
Start the vSphere Auto Deploy Service
- Start the service. It’s included in the vCenter Server collection of services.
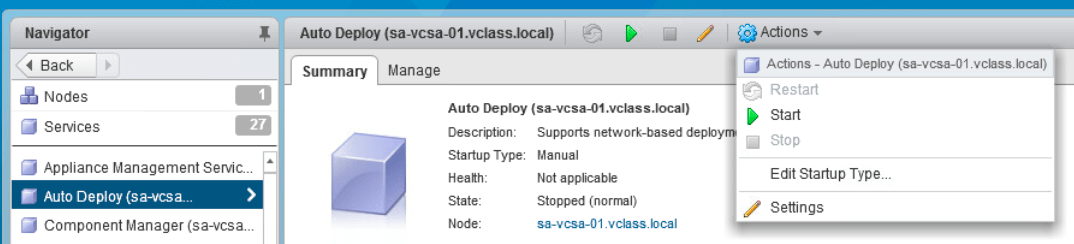
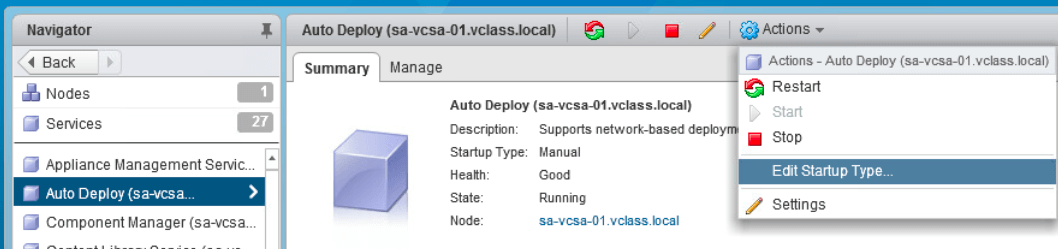
It’s set to manually start first so change the startup type to automatic.
-
Prepare the TFTP Server
- Download the TFTP boot zip file deploy-tftp.zip from Auto Deploy. The ZIP file contains undionly.kpxe.vmw-hardwired.
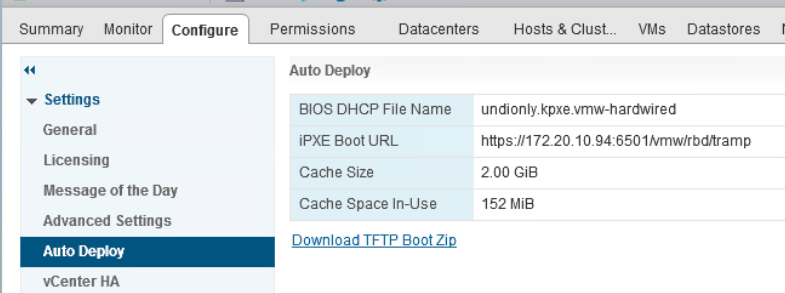
Once downloaded to the client machine, unzip it.
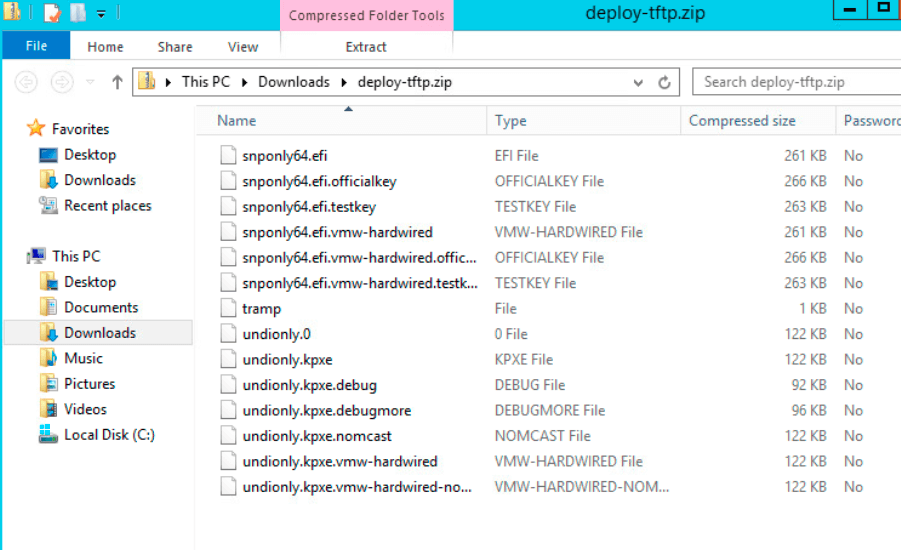
Copy the unzipped files to the TFTP servers root directory. The root directory is specified in the TFTP_Root parameter on the TFTP server. (See below for steps to do this on vCSA in a lab).
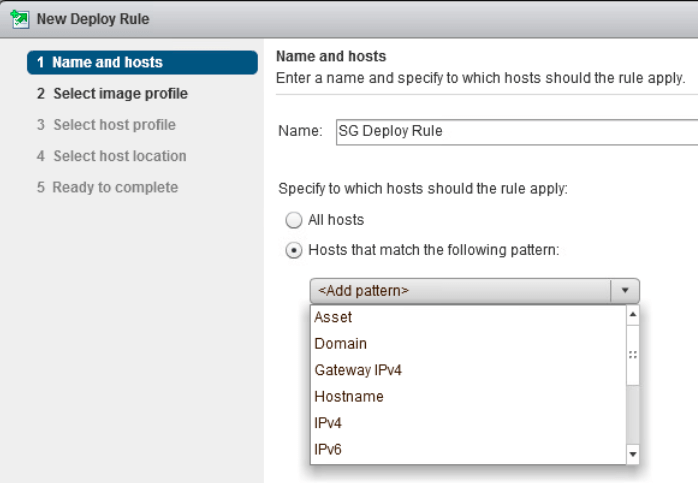
- Create one or more deployment rules
-
Create the rule with the Auto Deploy wizard.
-
Add it to a rule set, only two rule sets, the active rule set and the working rule set are supported. You can add the rule to both or just the working rule set. Once added you cannot change the rule. You can copy and replace items in the copied version if required, although you can edit the rule if it’s in an inactive state.
-
-
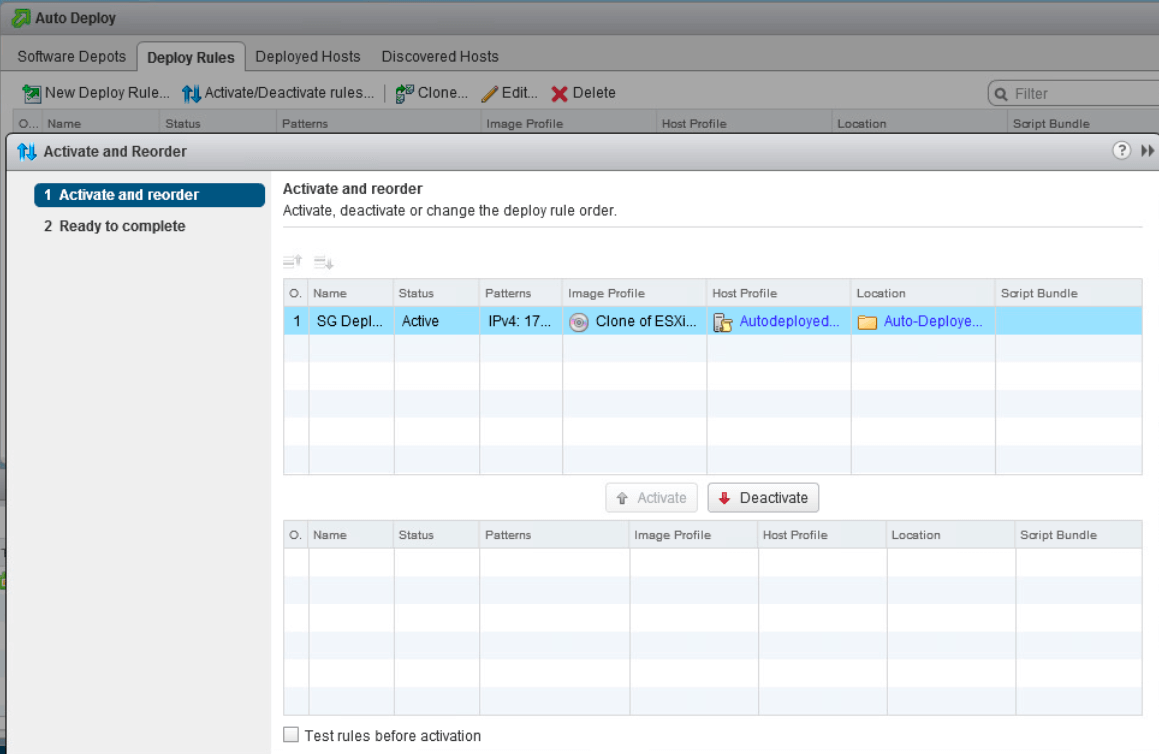
Activate the deployment rules
- After the rule is created it is inactive, active it for it to take effect. Use the activate and reorder wizard. (look for Activate/Deactivate rules).
Setting Up TFTP Server on vCenter Server Server Appliance (Optional, Lab Only)
Above we copied the TFTP files, for testing purposes you can put this on vCenter Server Appliance.
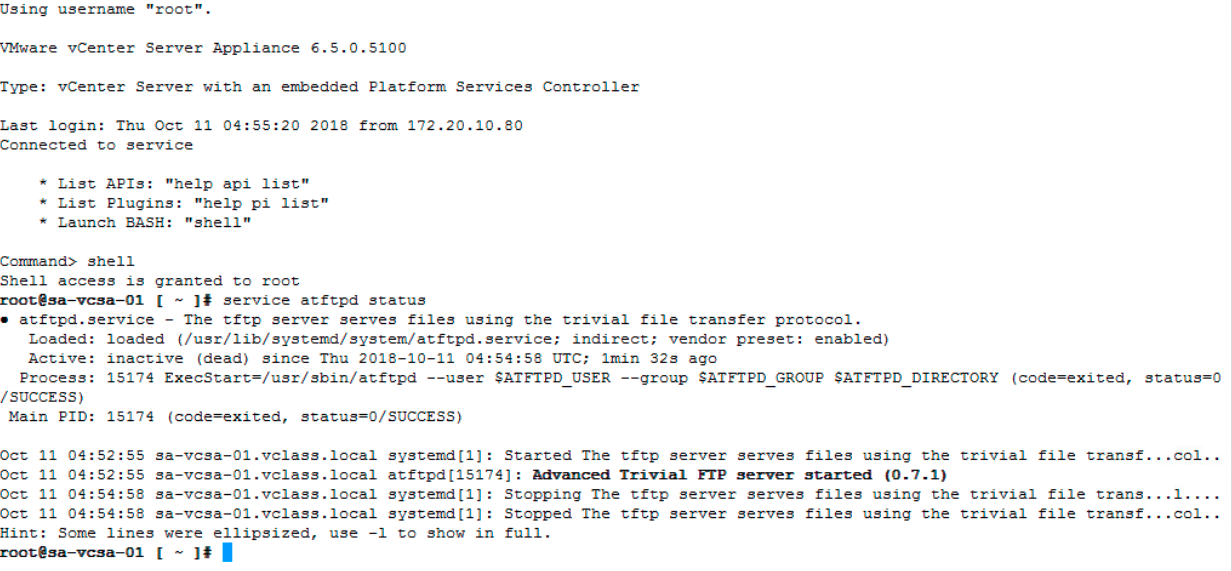
Connect to vCSA, enable Shell and check if atftpd is installed using service status. If not installed use yum to install.
shell
service atftpd status
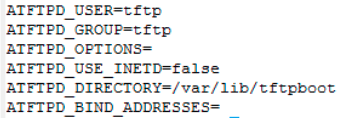
Edit the TFTP directory and set it to the location where you will copy the TFTP files.
vi /etc/sysconfig/atftpd
Edit the line that says AFTFP_DIRECTORY, so in my case its ATFTPD_DIRECTORY = /var/lib/tftpboot
Upload the files to the contents of the uncompressed deploy-tftp.zip to the tftpdboot directory. (WinSCP etc.)

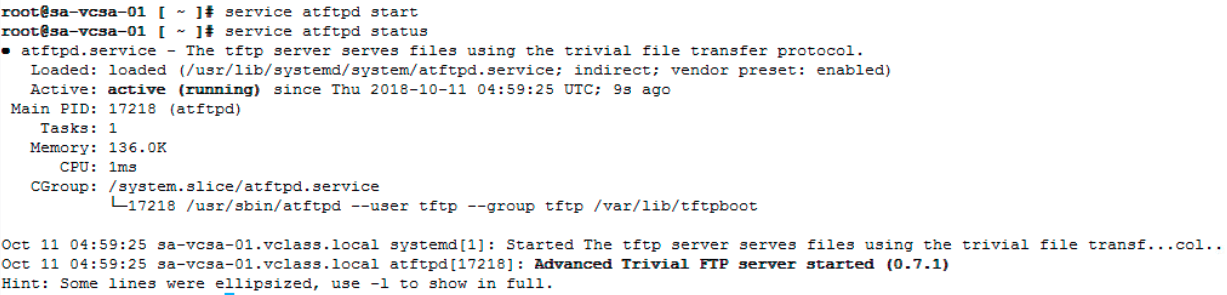
Now start the atftpd service and check it’s running.
service atftpd start
service atftpd status
Finally open the firewall ports to allow traffic through on port 69.
iptables -A port_filter -p udp -m udp --dport 69 -j ACCEPT
Notes on Managing Auto Deploy
Rule Set Change
New hosts are deployed with the changed rule, existing hosts only have the new rules applied when you test the hosts rule compliance and perform remediation. This can be achieved with Test-DeployRuleSetCompliance PowerCLI.
Management Cluster
vCenter Server resides in the management cluster in your environment, all the hosts in the management cluster must not be managed by Auto Deploy.
Reboot Operation
vCenter Server does not need to be available for reboots of stateless caching hosts or stateful hosts but it is required for stateless hosts that don’t use caching but only if those hosts boot or reboot, the ones up and running keep running.
Update Manager
You can only install host patches that don’t require a reboot as it’s not possible to add updates to a host that PXE boots. Instead you need to add the patches to the image that Auto deploy uses, this can be done manually using either the web client or ESXi Image Builder CLI.
Tagged with: vSphere