Import VMs from vCenter to vCloud Director using PowerCLI
18 Apr 2013 by Simon Greaves
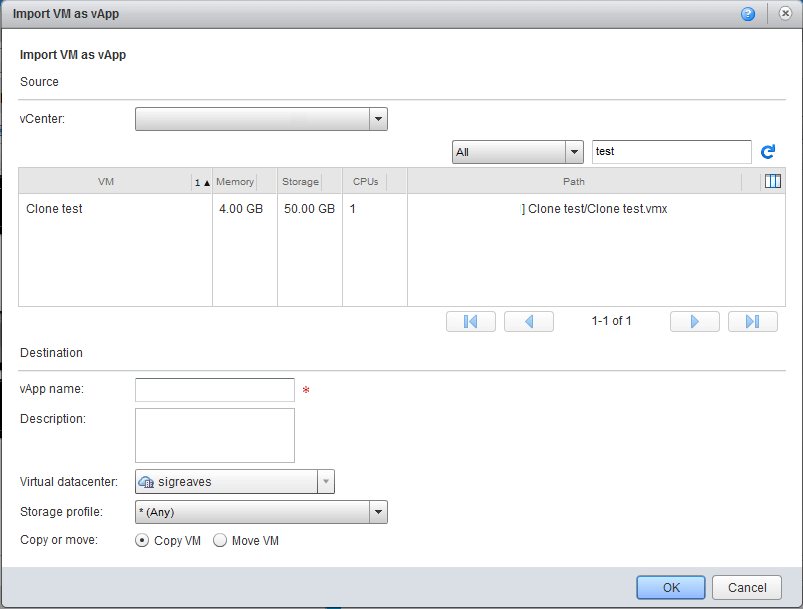
vCloud Director allows you to import virtual machines from the underlying vCenter Server which is perfect should you build a virtual machine in vCenter first, or perhaps have issues uploading VMs to vCloud Director such as when using the import OVF to catalog option. This import is very simple to perform by selecting the ‘Import from vCenter’ icon and choosing whether to copy VM or move VM. As the name suggests a copy will clone the virtual machine in vCenter, create a duplicate copy then migrate it into the relevant folder and resource pool. A move will move it to the new locations.
This works well if you are importing just one or two VMs but if you want to bulk import a load of VMs you are better off scripting it such as using PowerCLI.
PowerCLI has some useful commands you can use to import the VMs.
If you just want a quick script that you can use to import the VMs you can use the ones below.
Please note to remap the network to the relevant vCloud Director backed network you will need to use the second script as well. I find that running them one after each other doesn’t allow the import task to complete as vCloud Director sees that there is currently a change occurring to the vApp and won’t allow the remap to work.
You can run the scripts one after the other and it will work fine, not forgetting to replace the variables in ‘quotes’ with the names that are relevant in your environment.
You can highlight the code by double-clicking it to copy it Alternatively read on below and I will show you how to run them together.
Script to import VMs
$ciserver = 'vclouddirector.domain.com'
$viserver = 'vcenter.domain.com'

Connect-VIServer -Server $viserver
Connect-CIServer -Server $ciserver

$orgvdc = 'OrgvDC_Name'
$vms = get-folder 'VM_Folder_Name' | get-vm
$civapp = 'vApp_Name'
$civms = get-civapp $civapp | get-civm

foreach ($vm in $vms) {
get-civapp $civapp | Import-CIVApp $vm -NoCopy:$True -RunAsync #-Confirm $false
}
Script to remap network.
Note it is assumed that you will run these scripts one after the other after waiting for the first one to finish.
$cinetwork = 'Org_VDC_Network_Name'

foreach ($civm in $civms) {

$civm | Get-CINetworkAdapter | Set-CINetworkAdapter -vappnetwork $cinetwork -IPaddressAllocationMode Pool -Connected $True

}

Disconnect-VIServer -Server $viserver -Confirm:$false
Disconnect-CIServer -Server $ciserver -Confirm:$false
An important note for this script is the -RunAsync command. This will tell the script to start processing the next VM in the folder without waiting for the last one to complete. Without it you are forced to wait for each import to complete.
This script above will tell the VM to connect to a vApp network and assign an IP address from the static IP pool.
Another options is that you can run them together by making the script temporarily wait in between. There are a few different ways to do this but the simplest way I have found is using a sleep command.
Start-Sleep -s 30
The above command will make the script ‘sleep’ for 30 seconds, adjust it to suit your needs. For this import I suggest starting with 30 seconds as that should give the vApp time to finish the import command of the last VM.
To put this all into one script use the following.
$ciserver = 'vclouddirector.domain.com'
$viserver = 'vcenter.domain.com'

Connect-VIServer -Server $viserver
Connect-CIServer -Server $ciserver

$orgvdc = 'OrgvDC_Name'
$vms = get-folder 'VM_Folder_Name' | get-vm
$civapp = 'vApp_Name'
$civms = get-civapp $civapp | get-civm
$cinetwork = 'Org_VDC_Network_Name'

foreach ($vm in $vms) {
get-civapp $civapp | Import-CIVApp $vm -NoCopy:$True -RunAsync #-Confirm $false
}

Start-Sleep -s 30

foreach ($civm in $civms) {

$civm | Get-CINetworkAdapter | Set-CINetworkAdapter -vappnetwork $cinetwork -IPaddressAllocationMode Pool -Connected $True

}

Disconnect-VIServer -Server $viserver -Confirm:$false
Disconnect-CIServer -Server $ciserver -Confirm:$false
Comments are closed for this post.